How to make a Chambered Hollow Wood Surfboard
Making a chambered wooden surfboard is not as hard as you think it would be! Using Australian grown Paulownia (hardwood), you eliminate the need for any fibreglass and resin – avoiding nasty chemicals and saving you money at the same time. Paulownia is a timber similar in weight to balsa, but much stronger. Balsa boards are usually not strong enough on their own, so they need to be glassed like a normal foam board. You can get all the supplies you need to make your hollow wooden board on our site.
Step 1 : Design your board – you can copy a board you already own or design your own template in a free software program such as AKU Shaper or Shape3d.
Step 2 : The first thing you need to do is determine the rocker of your board. You can print the rocker template from the above mentioned shaping programs.

Step 3 : Trace the rocker onto each piece of timber
Step 4 : Cut the rocker template out with a jigsaw or bandsaw, being sure to cut at least ¼ inch outside of the guidelines to allow for shaping.
Step 5 : Spot glue each piece of wood with normal wood glue or PVA glue. You only need a small amount of glue (the size of a 20c piece) every 12 inches or so. This glue is just to hold the wood together while you shape the board.
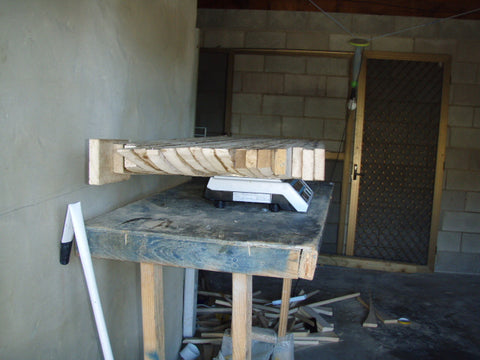
 Step 6 : Clamp the pieces together with even pressure along the length of the whole blank. Try and minimise any gaps in between pieces. You may need to clamp the blank in stages and do just a few pieces at a time.
Step 7 : Once the glue is set, you have a blank ready to shape. Trace your outline template onto the blank.

Step 8 : Cut the outline with a jigsaw, again ensuring you cut outside of the lines.

Step 9 : Clean up any bumps in the outline with a belt sander or planer.

Step 10 : Shape board as you would a foam board – our instructional videos show you how from start to finish.

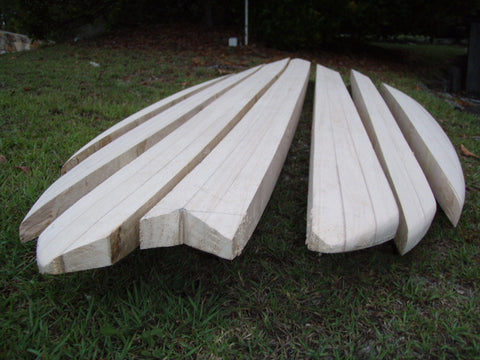
Step 11 : Once you are happy with your shape, you will need to break the blank apart again, being careful not to damage the wood. Use some off cuts or spare pieces of wood and gently bang the outside piece near the glue spot. Continue until the blank is completely broken apart into its original pieces.
Step 12 : Now you can draw your chambers onto the individual pieces in preparation for chambering. There are many different shapes and sizes of chambers to choose from. The more wood you remove, the lighter your board will be. Remember to keep more support under areas of high stress where your feet and knees will be hitting the board. The minimum thickness of the deck and bottoms skins should be at least 6-10mm. The bottom skin can be thinner as there is less force being applied to this area when surfing.

Step 13 : When you have your chambers drawn on the timber, you can cut them out using a router, hole saw or spade bit on a drill or even a jigsaw if you are using thinner pieces of timber. Remember not to chamber where you will be installing your fins so you have a solid anchor point for the fin boxes.
Step 14 : Once you are happy with the chambering, glue the pieces back together permanently using marine grade epoxy glue. Apply glue to the whole surface making sure not to leave any dry spots. You can score lines in the wood along the join (but away from the deck and bottom) with a screwdriver or chisel which will allow glue to seep in and create a stronger join.
Step 15 : When clamping be careful not to damage the timber as you will now be clamping curved rails. You can also use old bicycle inner tubes to clamp around areas where the nose and tail curves do not allow the clamps to sit. Wipe any excess glue from the joins.

Step 16 : Once glue is set, clean up any bumps and sand joins flush if they are not perfectly aligned.
Step 17 : Finish sanding board back to 800 grit and it is ready for sealing.
Step 18 : You can seal the board with epoxy resin, marine varnish or any other wood sealing product. Oil finishes are not recommended on hollow boards as water may seep into the chambers and make your board heavier.
Step 19 : Install a vent and/or vented leash plug to regulate the air pressure and avoid expanding air from airline travel or hot temperatures busting your board open. Install fin boxes.
